Week 9: Image Editing
Today you will learn how to use photoshop. You will go through the informational/tutorial videos below. Make sure you are paying attention and taking notes, we will discuss this information in class.
Objectives:By the end of this unit you will be able to:
|
VocabularyEditing – manual or automated manipulation of an image or design. There are two types of editing in Photoshop.
|
How to Use the Liquify Tool in Photoshop
How to Use the Liquify Tool:
The Liquify Tool is one of the most powerful image editing tools in Photoshop. It will allow you to “push and pull” pixels any way you’d like.
It is a common misconception that the Liquify Tool is only used for making people thin, but there are a bazillion great uses for the Liquify Tool . Fixing and adjusting clothing, creating caricatures, changing facial expressions and more.
You will learn some of the key techniques to learning the Liquify Tool including:
- Change Brush Size Often – Each area of your image will probably require using a different sized brush. The fastest way to change your brush size in Photoshop is to hold Control+Option(Alt) and click and drag your mouse to the left or right. When using a PC be sure to right click.
- Brush Pressure – It is better to use a lower pressure and make little adjustments than use a high pressure and have to undo your extreme changes.
- Brush Density – Keep your brush density on the higher end. This will allow you to effect a larger area per stroke, creating more natural alterations.
|
Using the liquify tool
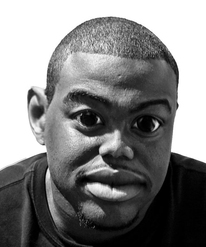
Caricature
|
Editing Clothing
Facial Expression
|
ASSIGNMENT #1: LIQUIFY TIME
|
After reviewing the tutorials and seeing my demonstration you will use the liquify tool on your own.
You will need to: Choose 3 Photos Below to edit destructively.
|

|
|
File Naming:
1. Lastname_Firstname_Caricature.psd
2. Lastname_Firstname_Facial.psd
3. Lastname_Firstname_Baggy.psd
4. Lastname_Firstname_Myliquify.psd
1. Lastname_Firstname_Caricature.psd
2. Lastname_Firstname_Facial.psd
3. Lastname_Firstname_Baggy.psd
4. Lastname_Firstname_Myliquify.psd
Caricature One

|

|
Change Facial Expression

|

|
Baggy to Fitting
|
Caricature Yourself
|
Assignment #3: Just a splash of color
Today you will learn how to to single out a color in a photo to make a color splash photo.
|
Step 1: You need to Find 5 Pictures to Edit (All Must be School Appropriate)
1. A Professional Athlete in Action 2. An animal in the Jungle 3. A Musician on Stage in Concert 4. A picture of yourself 5. A Random Colorful Picture Step 2: You will edit each picture with a color splash of your choice. 1. You will save each picture as the original and the splashed version Step 3: Save the photos to your google drive folder labeled Photo shop Step 4: Save all of your files as a .psd in Google classroom. |
|
TEKS: